
It’s no secret that one of the best ways to learn is by discussing something, and it’s certainly important that all students learn how to speak with others. However, it’s also important to remember that not all students are speakers, and that not all discussions need to be verbal.
In her book, Quiet: The Power of Introverts in a World That Can’t Stop Talking, Susan Cain suggests that introverts are dramatically undervalued in an education system aimed at developing extroverts. Kristen Adler, assistant professor of cultural anthropology at Antioch College writes in a blog post titled “Balancing Introversion and Extroversion in the Classroom” that threaded discussions are “extraordinarily beneficial for introverts, and otherwise quiet students–as well as for extroverts.” They allow introverts, who characteristically think (long and hard) before they speak, to articulate their thoughts without having to jump head first into a conversation without a life vest; they also require extroverts to piece together their thoughts before saying the first thing that comes to their mind.
NowComment is an awesome and free online tool to host threaded discussions of texts, pictures, and even videos so that introverts and extroverts alike can share their ideas and learn to communicate effectively. **Yes, there are many other tools available for collaborating and discussing texts online (hello, Google!), but NowComment is particularly useful for moderating and organizing online discussions.
Getting Started
When you first go to NowComment, you will need to create an account using Google or Facebook, or by creating your own login. Once you log in, you can upload documents, including Microsoft Word or Excel, PDFs, images, html texts and images, and even videos (from your computer or a website like YouTube). You can also type your own text if you prefer. Finally, there are public documents where you can search for ready-made assignments. If you make your documents public, they will also become part of the public library.
Features
Once you have created an assignment, there are a wealth of options for moderating your discussion, which you can see in the screenshot below.
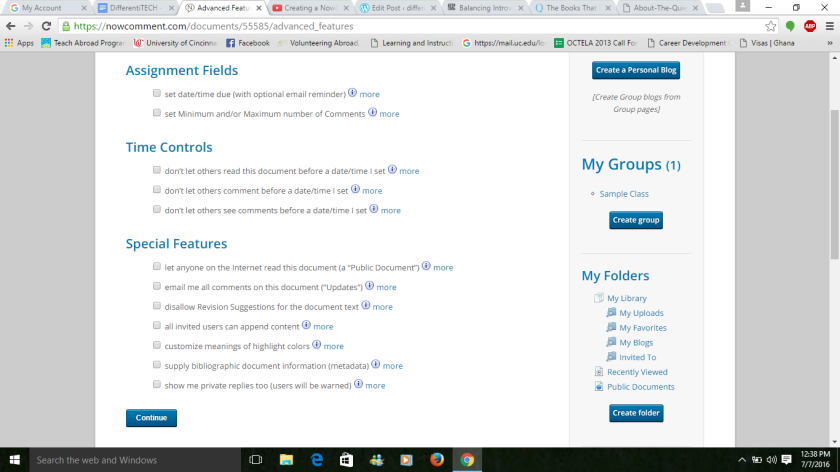
If you didn’t read through that screenshot (yes, I’m calling you out 😉 ), here are a few noteworthy features:
- You can set a due date (with optional email reminder).
- You can set a minimum number of comments that a student must post, and it will keep track (you can also set a maximum).
- You can keep students from seeing each other’s comments until a designated time. This is great for seeing what students are able to think of on their own, before they have had a chance to read what other students have to say. This is also good for introverts, who may be dissuaded from posting their comment if they see that someone else has already shared their idea.
- You can allow students to suggest revisions to a document. This, of course, lends itself well to editing and revising student work. Furthermore, when students suggest a revision, it requires them to fill in a field explaining why they made a particular change.
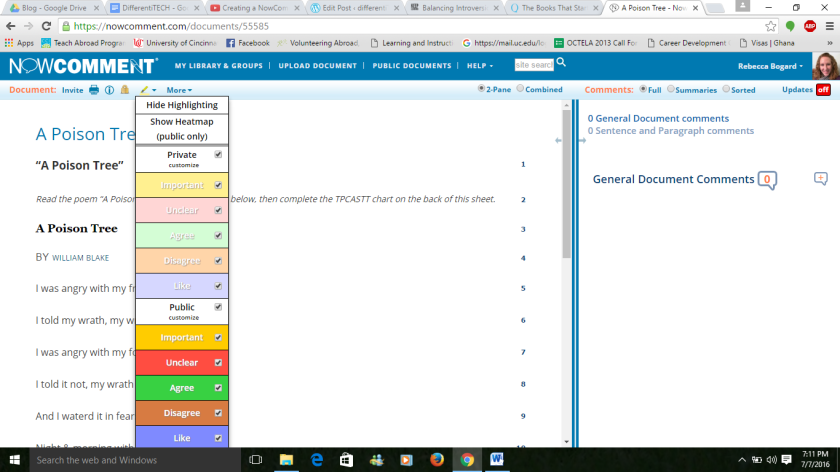
- You can highlight text and specify which colors designate what. With each document you assign, students can publicly or privately highlight text. Anything highlighted publicly is visible to all students, and you can click on it to see a heat map showing how many students highlighted that word or section as well as what colors they highlighted it. The default highlighting colors are yellow for “important,” red for “unclear,” green for “agree,” brown for “disagree,” and blue for “like.” You can change these when you create the assignment. Students can change their private highlighting colors, which only they, along with the document administrator (you) can see.
Sharing Assignments
After you set your options, you can create groups to share your assignment with by importing your class roster(s). Watch this video by Heidi Weber, a 2015 PBS Learning Digital Innovator, to learn how (it’s only three minutes long, and it’s very helpful)! You can create as many groups as you like, so you can assign texts to one student, one group, one class, or all of your classes! However, take note that if you assign one document to multiple groups, all comments will show up on that document. If you want the document to only have one classes’ comments, you will need to make copies of your document to assign to individual groups. This can be done by clicking on “My Library” at the top of the page, then clicking the “More” drop-down menu next to the assignment you wish to copy. Then click “copy” and you will be able to select how many copies you would like to make.
Hosting Discussions
When your students open your assignment, they will see a screen that looks like this:
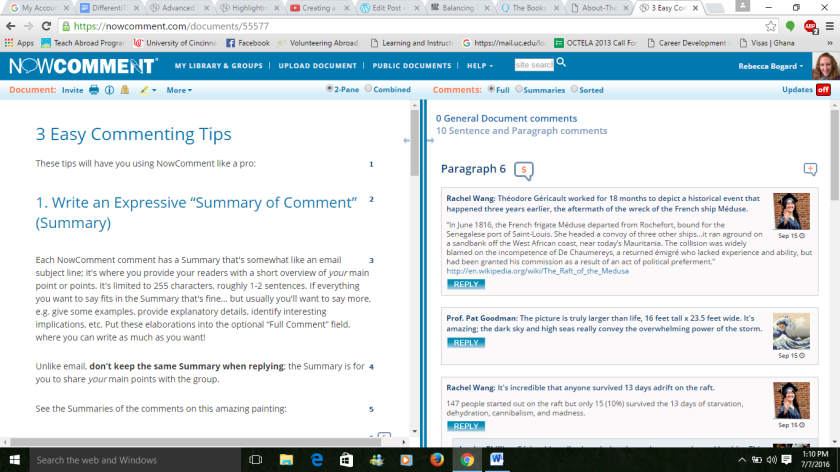
The default screen is in two panels, with the assignment on the left, and the commenting panel on the right. Students can make comments on individual sentences or multiple paragraphs by simply hovering over the text they wish to comment on. They can make comments on pictures or videos in the same way. When they click on a sentence or paragraph, they can immediately see any other comments made on that section. At this point, they have the option to reply to a previous comment on that section, or start a new thread if their comment is unrelated to the existing discussion.
When students post a comment, they must include a brief (255 character maximum) summary of their comment. The summary serves as a tagline, or almost like an email subject line for the student’s comment (nice opportunity to teach how to write an objective summary). Aside from the summary, the student’s full comment can be as long as they wish.
At the top of the comment panel, you can toggle whether you see full comments or just summaries. You can also sort comments by name, date, or tag. If you are grading students’ participation, this feature is a life-saver; you don’t have to dig through tons of comments to find one student’s posts.
Student and Class Blogs
If you end up using NowComment frequently, you may consider hosting a class blog, or having students create individual blogs to share and reflect on their work. Blogs are easy to set up on NowComment (there is literally a button that says “Create Class Blog” when you are in your group’s page, and button that says “Create a Personal Blog” when you are in your main login screen). After setting up your blog, you can upload excerpts from public documents or assignments as blog posts. Simple, but effective.
Ideas for Use
Obviously, NowComment is great for any discussion-related activity, but here are some general ideas for use:
- Assign a close-reading passage and have students highlight and comment on diction, tone, mood, symbolism, plot structures, characterization, or other literary devices.
- Have students upload their writing and practice revising and editing each other’s work.
- Post a painting or photograph and have students complete a collaborative OPTIC analysis.
- Post a scene from a film or documentary and have students discuss it.
- Have students read and discuss a news article about a current event.
- Host a debate.
- Assign word problems and have students collaborate to solve them.
- Have students comment on each other’s blog posts.
- Assign small groups a different text or task to work with, then have each group share out.
- Host a seminar.
And there you have it! Now you can comment with NowComment…and no comments from the peanut gallery! Just kidding. If you have comments, please let me know!
